|
To add new roles, you must have the FINANCE_ADMIN Master Role for FAST FINANCE Reporting. |
|
Most users don't need access to all menus and/or menu options, so you can add new roles and customize them for your institution. This gives you the ability to limit the menu options an end user can access.
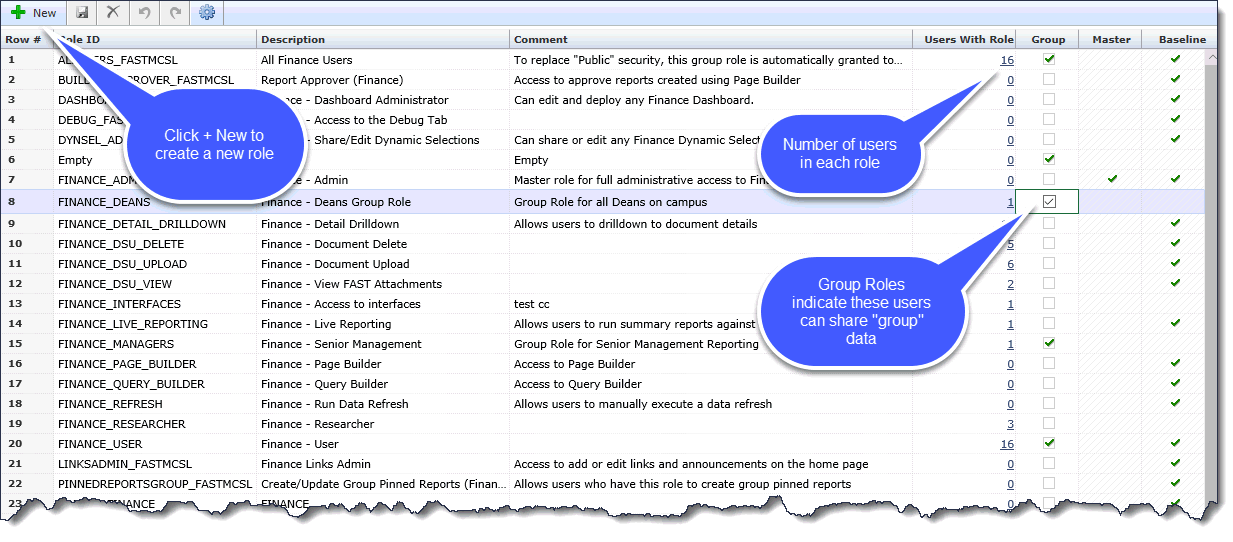
Master and Baseline roles are roles that have been created by MCSL. These roles are identified by the check mark in the Master and/or the Baseline column. You cannot delete the Master or Baselines roles, but you can edit the Description and Comments fields, or make it a group role for a pinned (saved) report.
When you create a new role, you need to give it a unique Role ID, and add a description and comments (optional). If the role is going to be used as a group role for pinned (saved) reports, you can select the check box in the Group column. If you edit the role, you can change the Description and Comment fields but not the Role ID. If you are no longer using a role, you can delete it.
The Define Roles Page utilizes the baseline Data Entry Grid functionality for ease of use.
In the Users with Role column, you can see the total number of end users currently assigned to each role. Administrators can also click on the hyperlinked number as a short-cut to the User/Role Assignments page if they need to edit the list of users.
On the Administration menu, click Define Roles.

Click  to add a new role.
In the Role ID box, type the new role ID in capitals, using underscores for spaces, for example HR_TRAINER.
The Role ID is used by the system and must be unique. The Role ID is always referenced in the online help, never the Description.
In the Description Lang 1 and Description Lang 2.boxes, type the name of the role, for example FINANCE TRAINER.
In the Comment Lang 1 and Comments Lang 2 boxes, type any comments.
If the role will be used as a group role to limit access to a pinned (saved) report, select the Group check box.
Click save  to add the role.
Only the Language fields can be changed.
On the Administration menu, select Access, click Define Roles.
Click  to edit a role.
In the boxes, you can change the Description Lang 1 and Description Lang 2 role names.
In the boxes, you can change the Comment Lang 1 and the Comment Lang 2 role names.
If you want this role to be used as a group role to limit access to a pinned (saved) report, select the Group check box.
Click save  .
.
You can only delete roles you created.
On the Administration menu, select Access, click Define Roles.
Find the role you want to delete and Highlight the row by selecting the Row # you wish to delete. Please note that you cannot delete Baseline roles.
Once the entire row is highlighted, select
the Delete button  .
.
Click Save  .
.